How to crochet the 3 layered rose motif | ease step-by-step tutorial
Learn how to crochet a beautiful three-layer rose motif with soft, dimensional petals. Use it as an appliqué for blankets, bags, cushions, garments and other handmade projects.
This post may contain ads and affiliate links, which help support Crafting with Beth at no extra cost to you. I only recommend tools and materials I genuinely use or believe will be helpful for your crafting. For more information, please see our Privacy Policy, Cookie Policy, and Affiliate Disclosure. Thank you.
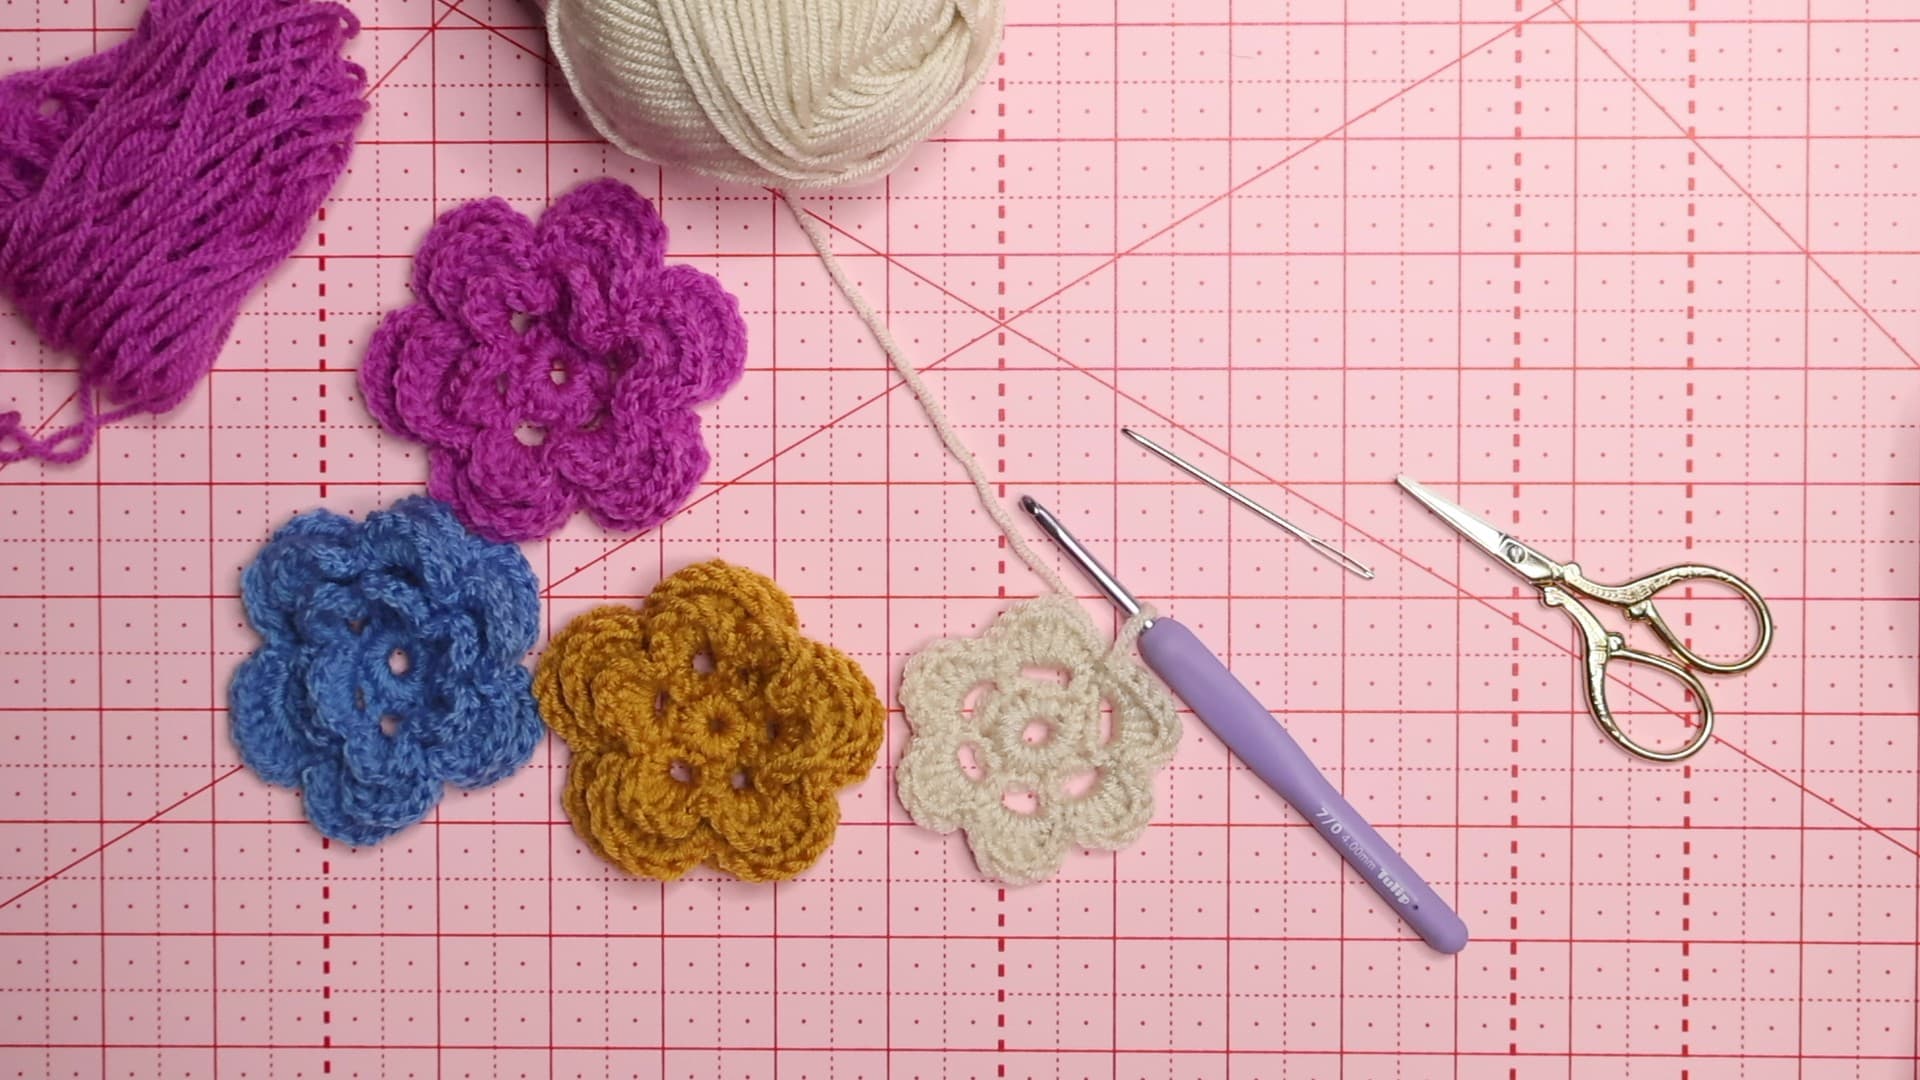
Create a beautiful layered crochet rose
Bring your crochet projects to life with this elegant three-layer rose motif. Worked in three rounds of petals, this dimensional flower creates a realistic bloom that’s perfect for adding a decorative touch to both modern and traditional crochet designs.
Whether you’re embellishing blankets, shawls, bags, cushions, hats or garments, this versatile crochet rose makes a beautiful appliqué or focal point. It’s also an excellent stash-busting project, allowing you to experiment with different yarn colours and fibre combinations.
Follow the step-by-step tutorial below to crochet each layer of petals and watch your rose blossom into a stunning floral motif that can be used in countless handmade creations.
Step by step instructions
Materials you’ll need
- Yarn: DK (light worsted) cotton yarn
I recommend using a smooth, light-coloured cotton yarn when learning this stitch, as it allows the ribbed texture and stitch definition to stand out clearly. A DK weight yarn works particularly well for practice swatches, scarves, blankets, and decorative home projects. Why not try the Paintbox Yarns Cotton DK - Crochet hook: 4.0 mm
I used a 4.0 mm hook for this tutorial. Ergonomic hooks like Tulip Etimo Murasaki crochet hook are especially helpful for textured stitches like this one, as they keep your tension even and reduce hand fatigue during longer sessions. - Scissors
For cutting yarn neatly at the end of your work. - Yarn needle
To weave in your ends once your swatch or project is complete.
Tip: If you tend to crochet tightly or loosely, don’t be afraid to adjust your hook size slightly to achieve a fabric you’re happy with.
To crochet the floating V-stitch, you don’t need a specific brand of yarn. A smooth DK yarn works best, as it helps the texture and stitch definition stand out clearly.
Yarn options:
- UK gentle readers: A beginner-friendly DK yarn from Laughing Hen
- International readers: A wide colour selection of DK yarns from LoveCrafts
Crochet skills required
Crochet stitches standard: I am using the US / International standard crochet terms.
This stitch is suitable for confident beginners and above. Before starting, it helps to be comfortable with the following basic crochet skills:
- How to make a slipknot (youtube video)
- How to crochet a foundation chains
- How to crochet the single crochet stitch
- How to crochet the half-double crochet
- How to crochet the double crochet stitch
Let’s get started
Tension is very important. The yarn must glide smoothly from your tension hand to your working hand — not too tight, not too loose — and follow the gauge of your hook.
Foundation chains
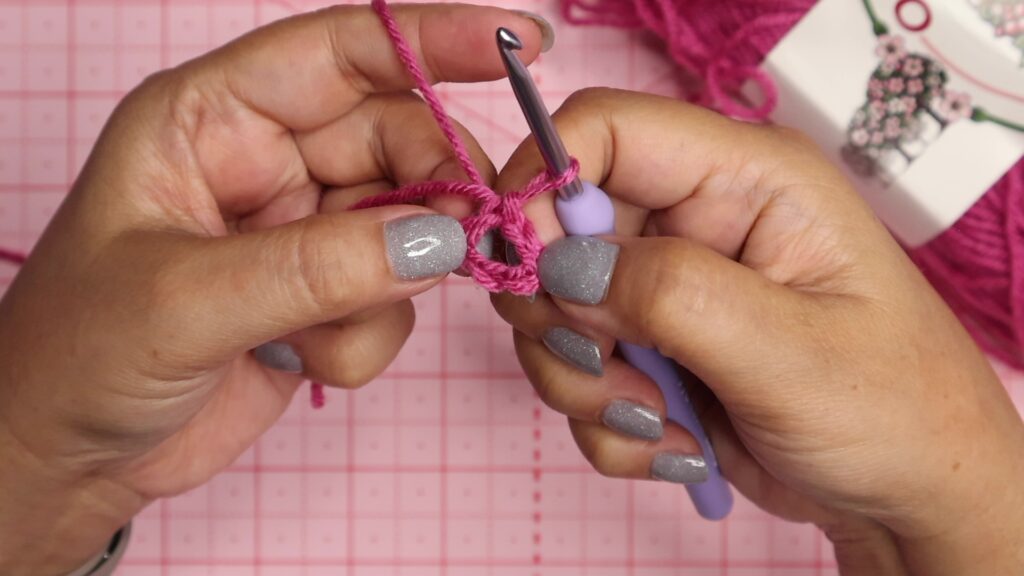
Make a loose slipknot, and then chain 6. Make a slip stitch into the loose slipknot and pull it tight to form a ring.
Round 1
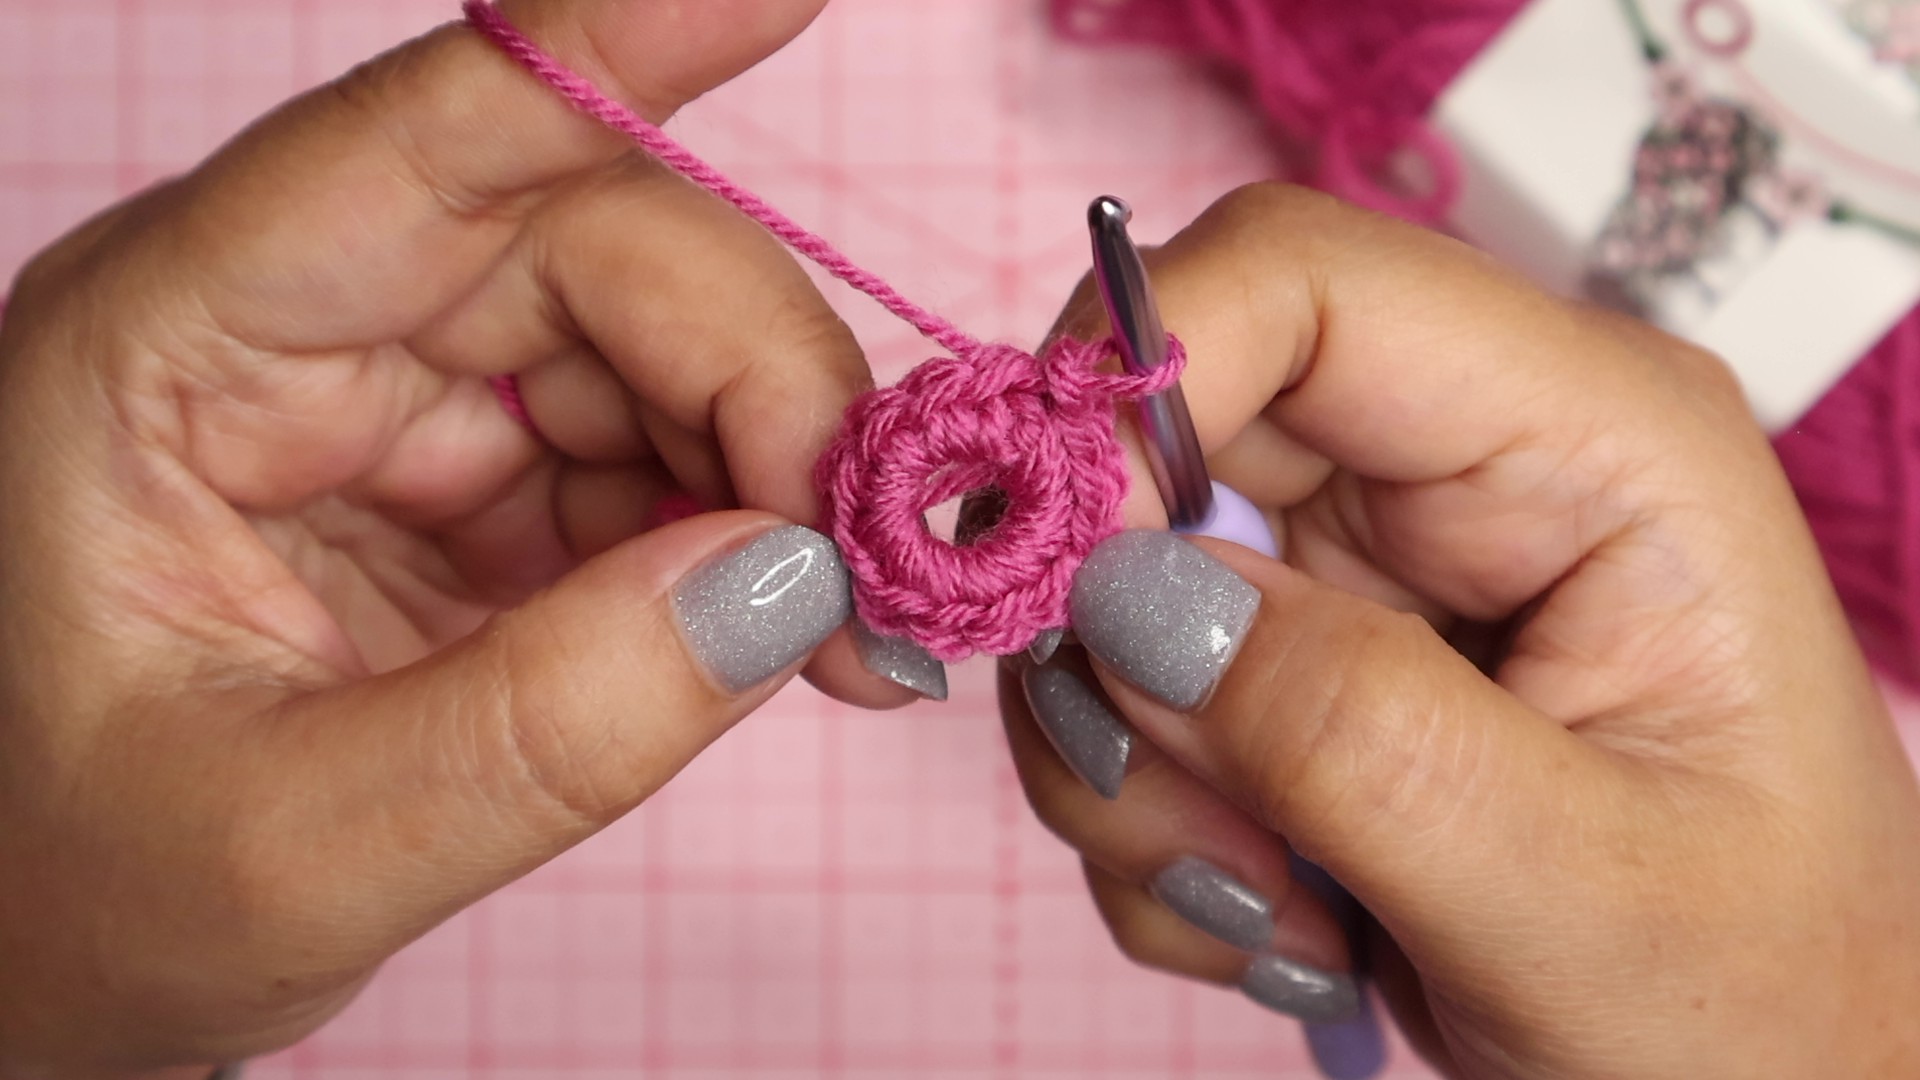
Chain 1, and make 12 single crochet into the ring. Make a slip stitch into the first single crochet made.
Round 2
Chain 1, and make a single crochet into the same stitch. Chain 3, * [skip the next stitch, and make a single crochet into the next stitch, chain]. Repeat * 5 times. Make a slip stitch into the first single crochet made.
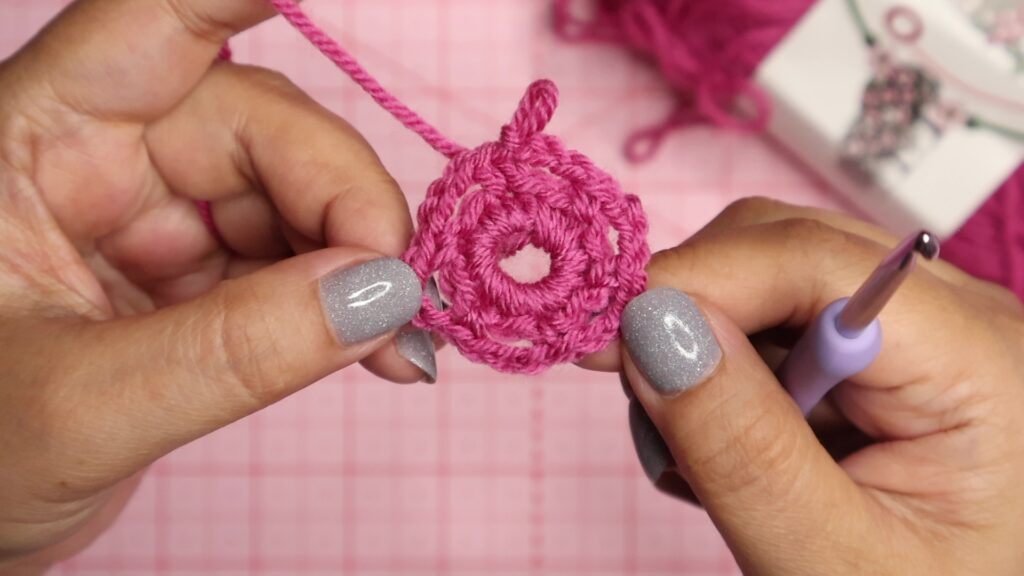
Round 3
To continue with round 3, *[straight into the next chain 3 space, make 1 single crochet, 1 half-double crochet, 3 double crochet, 1 half-double crochet, 1 single crochet]. Repeat * 5 more times. Make a slip stitch into the first single crochet made.
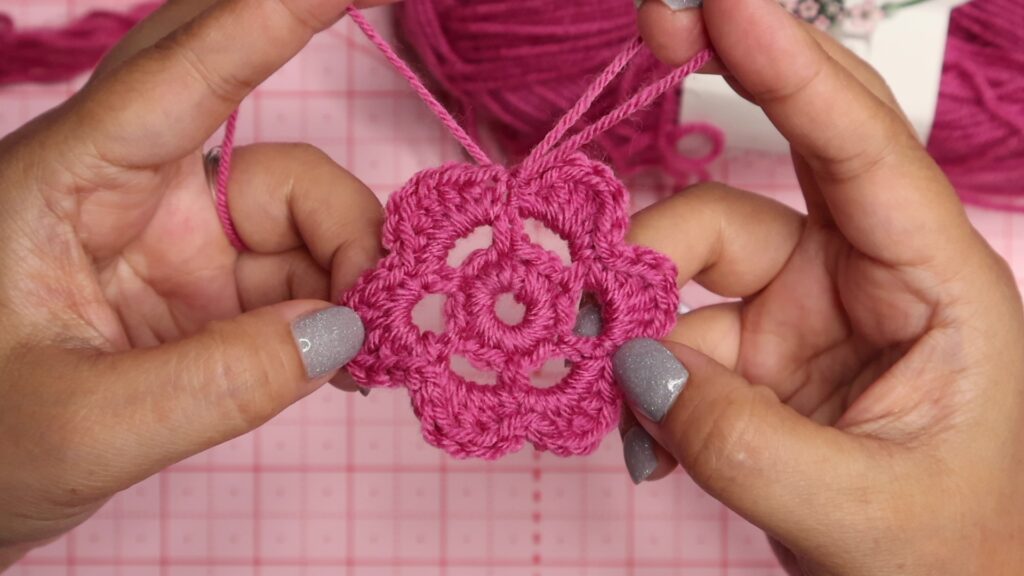
Round 4
To continue with round 4, look behind the pattern and look for the single crochet from Round 2. We’ll be working on these stitches. Pull up a loop into the first single crochet, and then chain 5. *[make a slip stitch into the next single crochet, chain 5]. Repeat * 5 more times. Make a slip stitch into the first slip stitch made. You should have 6 chain 5 spaces.
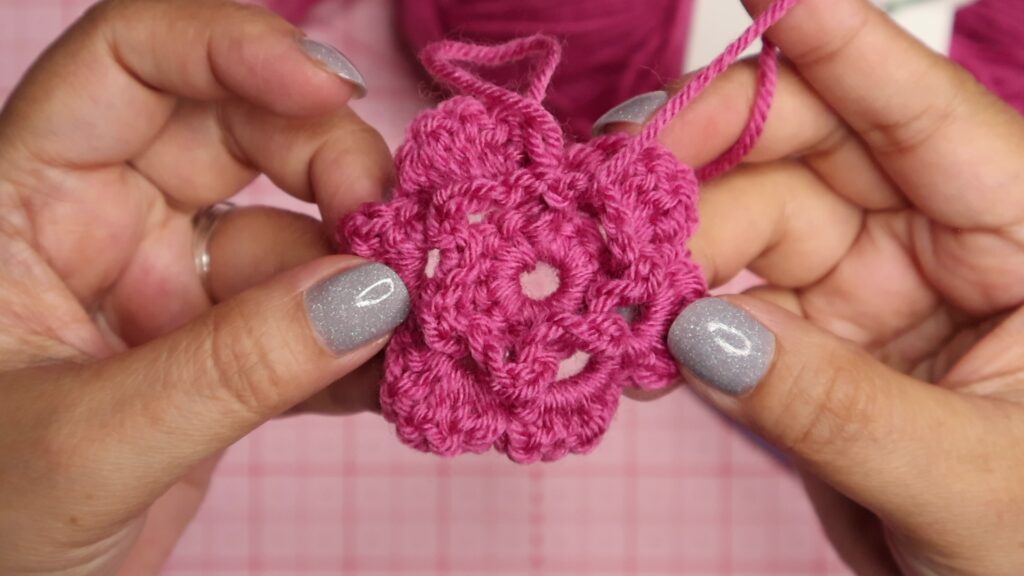
Round 5
To continue with round 3, *[straight into the next chain 5 space, make 1 single crochet, 1 half-double crochet, 5 double crochet, 1 half-double crochet, 1 single crochet]. Repeat * 5 more times. Make a slip stitch into the first single crochet made.
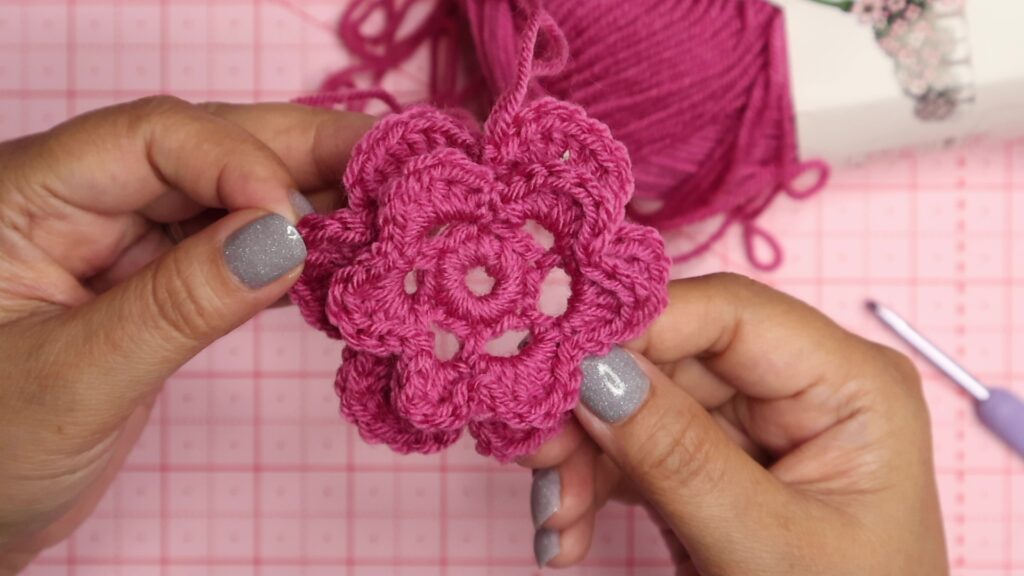
Round 6
For round 6, look behind the pattern and look for the slip stitches from Round 4. We’ll be working on these stitches. Pull up a loop into the first slip stitch, and then chain 7. *[make a slip stitch into the next slip stitch, chain 7]. Repeat * 5 more times. Make a slip stitch into the first slip stitch made. You should have 6 chain 7 spaces.
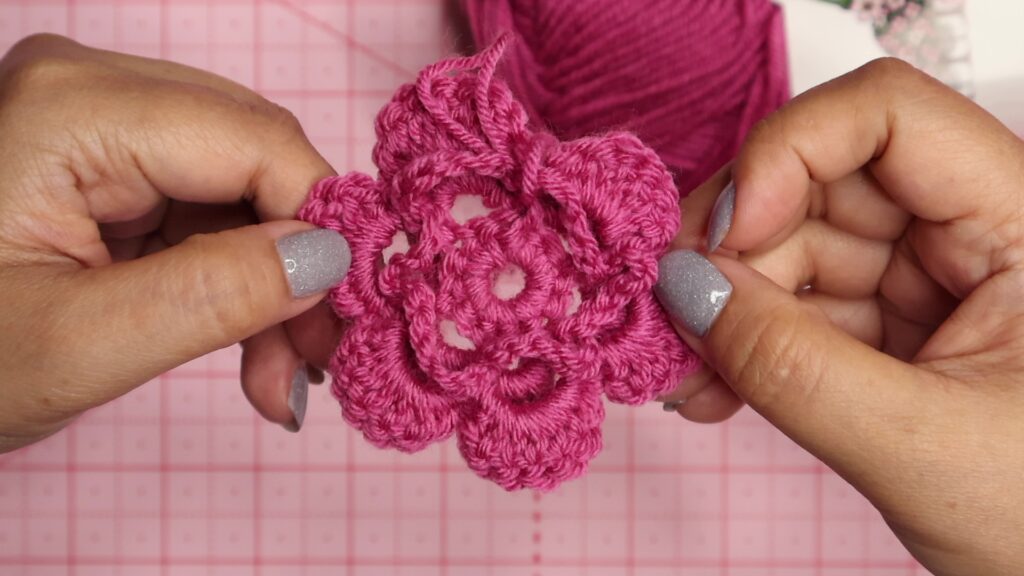
Round 7
To continue with round 7, *[straight into the next chain 7 space, make 1 single crochet, 1 half-double crochet, 7 double crochet, 1 half-double crochet, 1 single crochet]. Repeat * 5 more times. Make a slip stitch into the first single crochet made.
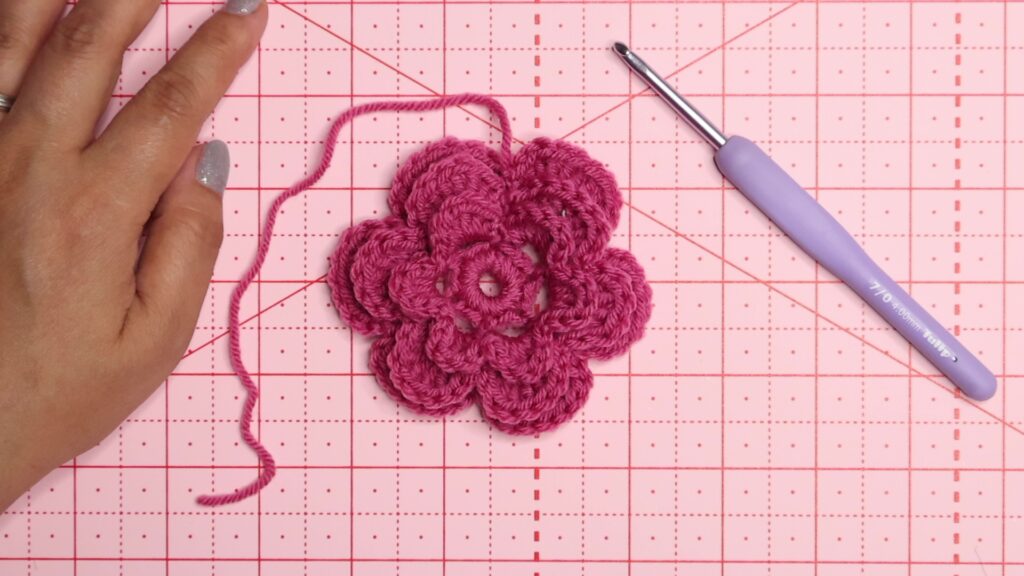
What’s next?
I hope you enjoyed learning how to crochet this three-layer rose motif. Whether you use it as a decorative appliqué or combine several motifs into a larger project, it’s a beautiful way to add texture, colour and a handmade floral touch to your crochet.
If you found this tutorial helpful, be sure to explore my growing collection of free crochet stitches, motifs and granny squares for even more inspiration. New tutorials are added regularly, so there’s always something new to discover.
Happy crocheting!
© Crafting with Beth.
This pattern describes a common crochet technique. While crochet stitches and methods are not copyrightable, the written instructions, photographs, and explanations on this page are original and protected by copyright.
Made with care and shared with love. You may sell finished items made from this pattern, but please do not copy, reproduce, or redistribute the written instructions. Please credit Crafting with Beth when sharing your work.